Dine In or Dine Out? I’ve Got My Answer

Caeser Salad with Salmon from Mango II Cuisine
Tony ordered this simple Caesar salad with salmon, but it was the beautifully carved carrot that so impressed me. That must have been a really big carrot!


Dine out! Lately, it seems, the answer is always, dine out. I realize this may not be the healthiest option, but it sure is enjoyable.

In the last year, Tony and I have embraced the concept of eating out. I am sure it comes with the stage of life we are in and the age of our children, but we have reached a point when sitting down to a relaxing meal outside the home, with or without the kids, is ultimately satisfying. My waist line isn’t so sure about all of this, but I’m in a YOLO (you only live once) state of mind, so I’m going with it for now.

Then

Let’s be honest, at certain points of child-rearing, a meal was simply a means to an end to fend off hunger. When the girls were little we did family dinners. While the little lovelies fidgeted in their seats, Tony and I sat exhausted wondering who’d have the most energy to do the dishes following the meal. Finger on my nose  – you’re it!

Now

Today, we have teens who are more independent and, suddenly, time is back on our side.

It’s funny – the very thing that prevented us from being able to dine out more often is now the thing that is enabling it…youth sports!

In the past, the kids’ schedules were erratic. We were either unable to or too tired to dine out on a regular basis.

This year, activities are more manageable and, currently, both girls are fully engaged in basketball season. Meanwhile, Tony and I find ourselves with more free time.

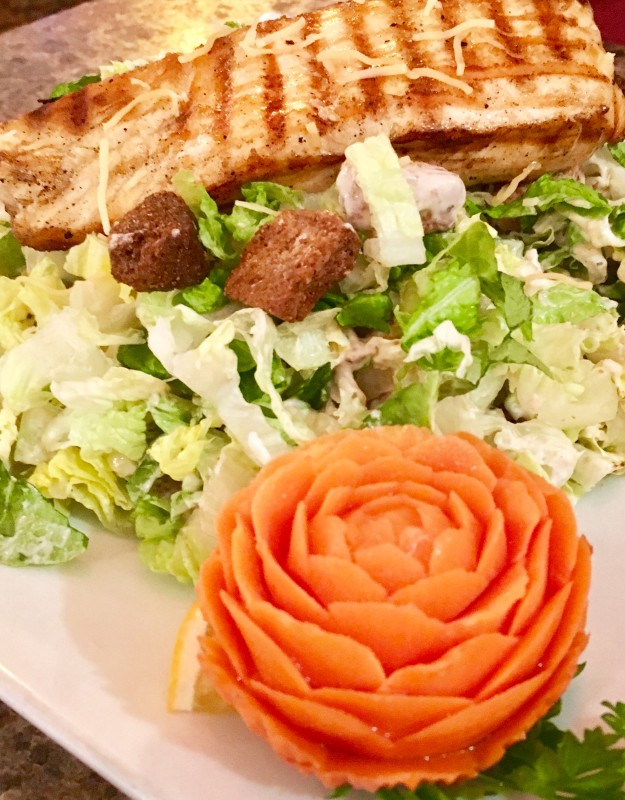
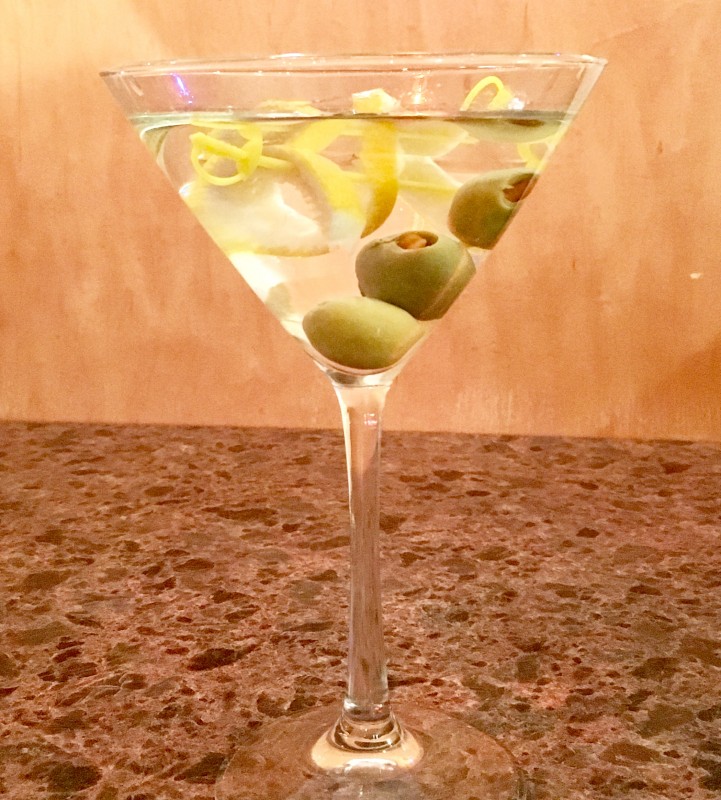
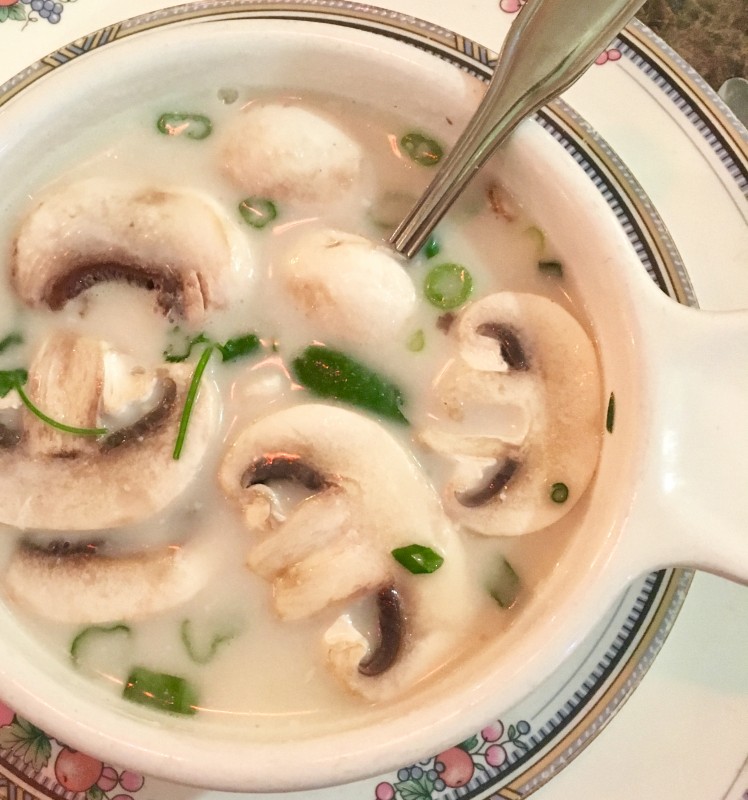
We have now made a habit of using the time during practices, after drop-offs and before or after games to dine out. Time might allow for a full meal or maybe just an appetizer or cocktail. We look forward to the time to catch up with one another or friends who join us. The more we go out the more we want to. Basketball has never been so much fun. Take a look at this fabulous food, and drink, we enjoyed at a little Thai restaurant in Tewksbury.  We discovered Mango II Cuisine before a basketball game on Friday night.


3 olives & a twist martini at Mango II Cuisine
A thing of beauty
appetizers and cocktails from Mango II Cuisine
Two apps and a cocktail made a perfect pre-game meal.
coconut soup with mushrooms and chicken from Mango II Cuisine
I wanted something different -I ordered this coconut soup with mushrooms and chicken and was wowed. So good!


I do feel guilty that I don’t cook at home more often these days. Truthfully, I don’t love to cook and there are very few meals I can prepare that everyone in my house will eat. Between allergies and picky eaters (one of whom is an adult and not me!) preparing meals at home is laborious and frustrating. So, I’m over it.

My dream is to be a city girl someday. I want to walk to restaurants of all kinds for brunch, lunch or dinner.  I want to try new foods and dine out in cool, new settings.

So, while I wait for my dream to become a reality, I will live it right here in the suburbs I call home.

Cheers and Bon appetite!

10 Comments Continue Reading

French Toast Casserole Recipe – A Brunch Favorite

french toast casserole with strawberries


Last week, I had the pleasure of hosting Julia’s varsity basketball team for brunch following their practice. I gave the menu some serious thought because these girls are ravenous following two hours of sprints, drills and scrimmages.

Loading up on bagels and muffins was the easy and filling choice, but I also wanted to make something homemade. This French Toast Casserole recipe, originally found on Allrecipes.com, was the perfect dish. It is easy to make, hearty and unbelievably delicious.

When several of Julia’s teammates reported that it was the best thing they’d ever eaten, I took that as the highest compliment. When the double batch that I prepared for them was devoured, I knew I had a winning recipe worth sharing.

If you like French Toast, give this recipe a try. And when you take your first bite, be sure to dig deep.  The best part is the brown sugar butter at the bottom!

French Toast Casserole Recipe

Ingredients

french toast casserole ingredients


  • 1 cup brown sugar
  • 1/2 cup butter
  • a pinch of salt (this is my addition just to help balance all of the yummy sweetness)
  • 1 loaf crusty bread (I used Italian, original recipe calls for French), cut into bite-size pieces
  • 2 cups milk (I use fat-free which is what I have in the fridge, but I imagine whole milk would take this recipe over the top)
  • 6 eggs
  • 2 teaspoons vanilla extract
  • 1 teaspoon ground cinnamon
  • 1 additional tablespoon brown sugar

Directions

  • Grease a 9×12-inch baking dish.
  • Stir 1 cup brown sugar, butter and salt together in a saucepan over medium-low heat until butter melts and sugar dissolves into butter, 2 to 4 minutes. Pour into prepared baking dish and spread a 1 1/2- to 2-inch layer of bread pieces over the top.
  • Beat milk, eggs and vanilla extract together in a bowl; pour milk mixture over bread into the baking dish. Cover with plastic wrap and compress bread to ensure liquid is absorbed. Sprinkle cinnamon over the top. Secure plastic wrap and refrigerate, 8 hours to overnight. (I have neglected to take this step and the end result has been just as good.)

When ready to bake:

  • Preheat oven to 450 degrees. Uncover baking dish and sprinkle remaining brown sugar over the top.
  • Bake about 30-40 minutes until you see a rise in the bread mixture ensuring the eggs are cooked through. Top should be brown and bubbly.

If you’ve got a lot of mouths to feed for breakfast or brunch, give this French Toast Casserole recipe a try. Your guests will love it.

3 Comments Continue Reading

White Chocolate Covered Popcorn with Crushed Candy Cane

white chocolate covered popcorn and hot cocoa with marshmallows


Around the holidays and throughout the winter, I love to make this super simple popcorn recipe that is always a huge hit. My sister first introduced me to white chocolate covered popcorn several years ago. Thank you Karla!

I’ve always been a fan of white chocolate so the combination of creamy, sweet “chocolate” (some argue that white chocolate is really not chocolate at all – I don’t’ care, I just like it) plus the salty popcorn is a delightful bite.

The simple, two ingredient treat became a go-to dessert that I’d bring along to parties, play-dates or pretty much wherever.  Everyone loved it. I would always label it indicating that the white on white bowl of popcorn was, in fact, white chocolate covered popcorn. Without this explanation, I’m pretty sure people thought I was showing up with a plain bowl of popcorn.

If you know me, I’m not much of a baker so that might have been a distinct possibility. Just this week, I contributed two cookie desserts to our annual family cookie contest and you would have thought the baking aisle of a grocery store had exploded in my kitchen. Sugar, melted chocolate, pots and pans were everywhere. While the end result was actually pretty good, the mess was beyond my desire to repeat the baking process any time soon.

As it was, the white chocolate covered popcorn recipe was perfect for me because it was so easy. But after a few years, I began to get bored with the same old thing and started to get creative with add-ons. My most successful addition was crushed candy cane. It took the recipe from awesome to outrageous. The peppermint flavor brightened up the sweet and salty combo and the pops of red added a pretty dimension to the presentation.

When I paired the updated version of my sweet treat with a cup of hot cocoa the reviews were even more favorable. The kids loved it when they’d come in from sledding and would devour an entire bowl while warming up with cocoa. The scene always gave me a warm feeling and still does.

Just last week I served my white chocolate covered popcorn with crushed candy cane to a group of friends and I couldn’t have been happier to see them nibbling away, bite after bite.

So how simple is it?  Here’s the recipe.

White Chocolate Covered Popcorn with Crushed Candy Cane

Ingredients

  • 1 large bag of microwavable popcorn, popped
  • ½ bag of Nestle white chocolate morsels (12 oz. bag), melted
  • 1 cup crushed candy canes (less or more according to your taste)

Directions

I use the microwave but if you are not a fan of nuking your food, you can prepare your popcorn and chocolate on the stove top. If you do melt your white chocolate in the microwave, start at 1 minute, remove and vigorously stir, then return to the microwave for 15 second increments. Stirring vigorously each time until all morsels have melted. The morsels will continue to melt significantly as you stir, so you shouldn’t need to microwave more than 2 or 3 times.

Place popcorn in an oversized bowl, drizzle white chocolate and mix until all popcorn is coated. Add crushed candy cane, mix gently and spread onto a parchment lined cookie sheet.  Let sit until chocolate hardens or if you have room, pop in the refrigerator and it’ll be ready even sooner.

Once hardened, break apart, serve and enjoy!


Happy Holidays, Merry Christmas and Much Joy!


If you are still looking for a special gift to give, consider a gift certificate to my latest sponsor, Daring Spirits. Link directly to their site from the image in the sidebar to the right.

Or stop in to Helen Thomas in Andover -open until 9 pm every night until Christmas- link to their Facebook page from the sidebar.

Next Post Wednesday 12-28-2016


5 Comments Continue Reading

Caramelized Onion & Herb Cheese Tart Recipe

onion tart recipe ingredients: onions, pie crust, herb cheese
3 simple ingredients


Looking for a last minute appetizer recipe for Thanksgiving? This onion tart recipe is so easy and calls for only three main ingredients.

Caramelized Onion Tart Recipe

I served these little bites, along with my super easy Apple Pie Crescents recipe, back at my Daring Spirits event. They’ve been a big hit every time I’ve made them and in recent weeks I’ve whipped them up three times for different occasions. They’ve gotten such rave reviews, I find myself bringing them over and over again just for the accolades. These caramelized onion tarts are tasty, filling and can serve a decent crowd. A double batch is as easy to make as a single, so bring on the onions. Although I’m not a crier when it comes to cutting onions, this might be an occasion to review some tear-free onion cutting tips. Not sure that all of these work, but may be worth a shot.

Ingredients

  • 4-6 large onions (yellow are fine), sliced – once these are caramelized they reduce quite significantly so you need more than you think.
  • Garlic & herb spreadable cheese – at room temperature, really helps when spreading.
  • 1 package pie crust – cut into rounds
  • 2-3 Tablespoons oil
  • 2-3 Tablespoon butter

Directions

Add the butter and oil to a warm pan. Not too hot that it will burn the onions. Medium to medium-high should do the trick. Add onions and cook down until caramelized. This is the longest part of the process, about 15-20 minutes. Stir frequently.

Onions being prepared for onion tart recipe
Stages of the perfect caramelized onions

Meanwhile…

Roll out your prepared pie crust and cut into rounds, I use a small juice glass. Place on a parchment lined cookie sheet and bake according to instruction until rounds are lightly golden brown. Tip: I’m generally for using store brand products when possible, but I must admit that having used both store brand and Pillsbury for this recipe, I would go back to Pillsbury for all of my future tart needs. The store brand was far more fragile when bringing all the ingredients together.

steps involved in making this onion tart recipe
A few easy steps


Once cooked, remove and let cool.

Be sure to check on your onions and give them a stir once in a while. You want them to be a rich caramel color to bring out the sweetness and deep flavor.

Next…

Once the pie crust rounds are adequately cooled, spread the garlic and herb cheese generously on each. Here’s where letting the cheese come to room temperature will make spreading much easier. Be careful with the rounds as they are delicate.

Top with 1-2 teaspoons of the caramelized onions and return to warm oven for another 10 minutes just to help the ingredients set and come together.

Serve and enjoy this easy onion tart recipe!

Caramelized Onion tarts
Plate and sprinkle with chopped parsley for a touch of color.


Have a wonderful Thanksgiving everyone and please note:

I am taking a break from posting next week for the holiday and will return with a new post Monday, November 28. Be well!


2 Comments Continue Reading

Crescent Roll Recipes – I Like Them Apples

Crescent roll recipes - Apple pie crescent with strawberries
A great bite-crescent roll recipes


I’m not much of a baker and as much as I love apple pie, I’ve never actually made one. Recently however, I came across an apple pie recipe, or I should say variation, that even I could handle.

Apple Pie Crescents

I’m not sure what prompted me to try these little bundles of yumminess – I must have seen a crescent roll recipes video on Facebook or a television commercial – I can’t remember which. Either way, it looked so darned easy; I decided to give it a go. With a total of five ingredients these tasty bites were calling my name.  The original recipe is from Pillsbury and is one of many clever crescent roll recipes they have available on their website. Who knew you could do so much with crescent rolls? Not me – not surprising!

My version came pretty close to the original, but I don’t think I’ve ever made a recipe without having to make at least one substitution. I’m always missing something or have an alternative that I prefer to use. In this case, I already had red delicious apples so I used those, and I also had pumpkin pie spice in my rack so I used that instead of the called for, apple pie spice. Waste not want not, right?

Ingredients

  • apple (I use whatever I have), peeled, cored and cut into 8 wedges
  • 3 tablespoons butter
  • 1, 8 oz. tube crescent rolls
  • 1/3 cup packed brown sugar
  • 1 tsp pie spice (I used pumpkin)

Next…

  • Heat oven to 375 degrees and line a cookie sheet with parchment paper. Can I just say that I don’t know what I’d do without parchment paper. I use it for everything from pounding chicken breasts into the perfect cutlet to lining my cookie sheet for absolutely anything I put on them.  It just makes for a no stick, no mess, no fuss cooking scenario that always makes me glad I took the extra step to lay it down.
  • Stir your apple slices with 1 tablespoon of melted butter, set aside.
  • Mix brown sugar and pie spice.
  • Lay out your 8 individual triangles of crescent dough onto your parchment lined cookie sheet.
  • Sprinkle each crescent with the brown sugar mixture. (don’t be overly generous here, otherwise you’ll end up with a oozy mess. A good, heaping tablespoon should do).
  • Place one apple on the widest end of the crescent triangle and gently roll til secure.
  • With the remaining two tablespoons of melted butter, brush each bundle.
  • Bake 10-12 minutes or until crescents are golden brown
  • Let cool. Do not cover until cooled as the trapped steam will render the delicious, crescent crust soggy (yes, I made that mistake.)
  • Done! So easy and so good.
apple pie crescent roll ingredients
Ingredients and the process.


The Review

I’ll be honest, when I first made these, I didn’t think the apple would be cooked through. I was wrong, they were perfect and it was a delicious bite.  I ended up making three batches for my Daring Spirits event last week and they received great reviews.

I have finally found a dessert recipe that I don’t mind making and with the holidays right around the corner, this is sure to be a go-to contribution for Thanksgiving and Christmas alike.

Enjoy! As far as crescent roll recipes go, this one is a keeper for sure. And try it with pumpkin pie filling too. My mom told me hers were a huge hit.


8 Comments Continue Reading